Place the picture frame molding against the miter box. (TIP: One viewer on Youtube had a great suggestion to laminate the cleaning checklist so that I can reuse it over and over again without having to print new ones or without removing it from the frame. Very simple!  Then be sure to SAVE it on Pinterest! For this project, I planned to frame a cleaning checklist for my kids to use to earn points towards an allowance.
  A miter box can easily be tucked away, though. Of course, a compound miter saw is much easier, but not everyone has a big ole power tool accessible to them, right?
 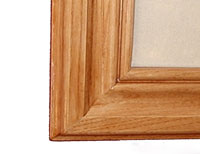 In fact, the only tools and materials you need are: (I participant in the Amazon Services LLC Associates Program, an affiliate advertising program designed to provide a means for me to earn fees by linking to Amazon.com and affiliated sites). Please try again. If you check Amazon, there are a bunch of options for picture frame molding. And whats awesome is that you can literally frame anything orany size just by cutting it to the length you need. Its cheaper to do that. Anyhow, instead of using a powerful compound miter saw power tool to cut the 45-degree angles, well be using a hand-held miter box to do it. You can frame pretty much anything, including favorite pictures! Your local home improvement store likely only has a simple wood one like the one Im using in this project.
  The first cut is usually at 45 degrees (as shown on the left side of the wood below).
  Your email address will not be published. That depends. or you can paint it like I did, laminate your checklist or printable, add a couple of layers of paint, lightly distress it, and there ya go! At this point, you should have all the pieces of the picture frame cut out. Remember to place one on the top and on the side, in case you decide to later use your DIY picture frame in a different orientation later! I definitely would invest the $8 $10 for a miter box and using that to get clean cuts. 35 DIY Ideas to Reuse Old Picture Frames for DIY Projects, 6 DIY Smokehouse Plans / DIY Smoker Ideas, 10 Cheap DIY Concrete Walkway Ideas You Can Install, 6 DIY Carport Ideas & Plans That Are Budget-Friendly, 10 DIY Floating Bathroom Vanity Ideas You Can Make, 20 DIY Cushions or DIY Pillow Ideas To Upgrade Your Seating, 10 Cheap DIY Shiplap Wall Ideas To Make Your Own Easily. Only this window screen has a layer of fabric glued over the wooden frame. If you have a builders grade bathroom mirror that youd like to frame around it. Otherwise, if you apply wood stain over glue, it will leave blotchy spots!
  After I printed out the checklist and trimmed it to the size I wanted, I simply placed it on the picture frame, lining up the left side, and then marking the width on the right side. For about $10 or less (check this one out on Amazon), you can easily cut thin pieces of wood and molding without having to use power tools. Be sure the clamps dont get in the way of the wood, though.
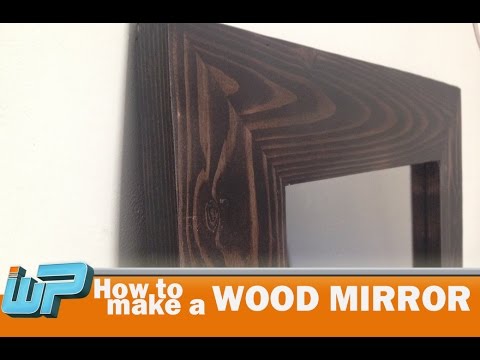
 When cutting the right side of the picture frame molding with the miter box, line up this marked line.. .with the edge of where the blade will cut.
  Im did end up laminating my checklist so that I can reuse it over and over without having to remove the back. A bit pricey, yes. . Even if youve got power tools, youll want to add a miter box to your DIY toolkit. I think home should be affordable. 30 Homemade DIY Greenhouse Plans (Free PDF). (Psst!

 With this cut, well be able to measure how wide we need to make the DIY picture frames. But picture frame molding already comes routed with a rabbet cut (in various depths), so all you have to do is cut the molding at 45-degree angles andVOILA!youve got a picture frame. very helpful video!! If have odd-shaped items that youd like to frame, that would be too expensive to pay for custom-sized frames. But since I have always bought frames from the thrift store and have never tried to make my own DIY picture frames, I had no idea it even existed!
  Turn an Old Knife Block into a DIY Crayon Holder, How to Make a DIY Polka Dot Stencil from Paint Chips, Light-duty stapler or small nails for holding in the picture/cardboard, A piece of cardboard (cut from a cardboard box). If youre cutting something square, all 4 pieces will be the same length. There are three ways you can cut wood with a miter box: Position #1 Cut the wood at a straight 90-degree. All those pieces of artwork that hubby has stashed in the closet can now be framed. There was an error submitting your subscription. Required fields are marked *, document.getElementById("comment").setAttribute( "id", "aba10d5fe42a2c756520f0b674a43671" );document.getElementById("d77b09630b").setAttribute( "id", "comment" );Comment *. I couldnt believe it was so easy to make! Love that idea!).
 Forget pulling out the intimidating tools. Heres my final verdict on DIY picture frames: Did you enjoy this tutorial? DIY CRAFTS | DIY PROJECTS | DIY HOME DECOR IDEAS, 60 DIY Pallet Garden Ideas | Vertical Pallet Herb Garden, 82 Cheap DIY Wall Art Ideas to Make for Home Decor, Aquarium Driftwood; Safest Types for Your Fish Tank. Position #2 Cut the wood at 45-degrees THIS way.
  Im not a professional framer so who knows if Ill stretch it properly, but this would be a pretty good DIY solution for framing! Using 150-grit sandpaper, sandthe custom picture frame, paying particular attention to the corners where it can be a little sharp.
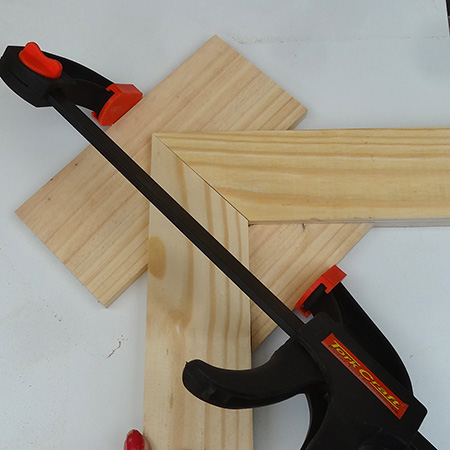
  Once the picture frame has had time to dry, remove the clamps and turn it over. To secure the back, I used a light-duty stapler to staple into the edge of the wood in the back, which was enough to hold the cardboard and checklist inside. Success!
  Thats pretty important for getting a clean cut. If they have the size you need, why make your own?? At that point, I was then ready to cut the other 45-degree angle. Picture frame molding can be expensive. Otherwise, it may chip off like mine did when I sawed through it. For this project, I didnt get glass cut, but you can easily head to a local hardware store (check your local listings for who offers this service; not every home improvement store does). Plus, sometimes its easier to use a miter box for a quick and easy little cut. do you think its possible to do it even without miter box??
 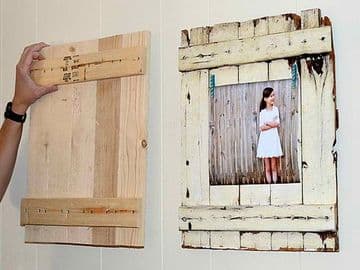 Now check your email to confirm your subscription. hello!
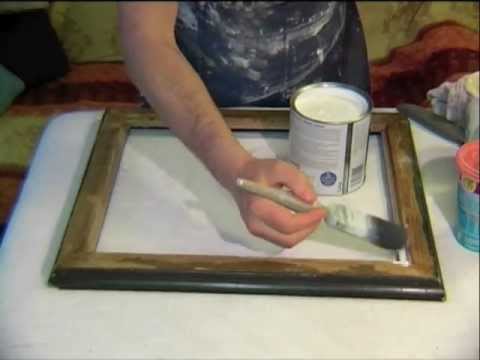
 Have you ever made your own DIY picture frames? Theyre super easy to attach with a hammer on the back. Youre now ready to glue themtogether and then clamp them to dry. Thrift Diving inspires women to decorate, improve, and maintain their home themselvesusing paint, power tools, and thrift stores! Be sure to check out my Project Gallery for more DIY projects! Here are the simple steps for making your own picture frames.
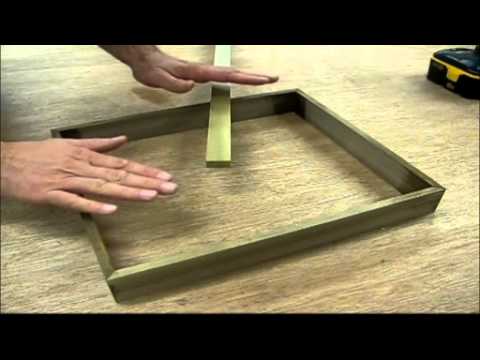
 NOTE: If you got glue on the wood and didnt wipe it off properly, be sure to sand it off if you can. 6 Simple Garage Storage Solutions You Can Do Yourself! Housing Market Predictions 2023: Will it Crash in 2023? Save my name, email, and website in this browser for the next time I comment. How did they turn out? You can use the miter saw to also make a privacy window screen, because the idea is the same: cut four pieces of wood using a miter box to create a frame.
Then be sure to SAVE it on Pinterest! For this project, I planned to frame a cleaning checklist for my kids to use to earn points towards an allowance. A miter box can easily be tucked away, though. Of course, a compound miter saw is much easier, but not everyone has a big ole power tool accessible to them, right? In fact, the only tools and materials you need are: (I participant in the Amazon Services LLC Associates Program, an affiliate advertising program designed to provide a means for me to earn fees by linking to Amazon.com and affiliated sites). Please try again. If you check Amazon, there are a bunch of options for picture frame molding. And whats awesome is that you can literally frame anything orany size just by cutting it to the length you need. Its cheaper to do that. Anyhow, instead of using a powerful compound miter saw power tool to cut the 45-degree angles, well be using a hand-held miter box to do it. You can frame pretty much anything, including favorite pictures! Your local home improvement store likely only has a simple wood one like the one Im using in this project. The first cut is usually at 45 degrees (as shown on the left side of the wood below). Your email address will not be published. That depends. or you can paint it like I did, laminate your checklist or printable, add a couple of layers of paint, lightly distress it, and there ya go! At this point, you should have all the pieces of the picture frame cut out. Remember to place one on the top and on the side, in case you decide to later use your DIY picture frame in a different orientation later! I definitely would invest the $8 $10 for a miter box and using that to get clean cuts. 35 DIY Ideas to Reuse Old Picture Frames for DIY Projects, 6 DIY Smokehouse Plans / DIY Smoker Ideas, 10 Cheap DIY Concrete Walkway Ideas You Can Install, 6 DIY Carport Ideas & Plans That Are Budget-Friendly, 10 DIY Floating Bathroom Vanity Ideas You Can Make, 20 DIY Cushions or DIY Pillow Ideas To Upgrade Your Seating, 10 Cheap DIY Shiplap Wall Ideas To Make Your Own Easily. Only this window screen has a layer of fabric glued over the wooden frame. If you have a builders grade bathroom mirror that youd like to frame around it. Otherwise, if you apply wood stain over glue, it will leave blotchy spots! After I printed out the checklist and trimmed it to the size I wanted, I simply placed it on the picture frame, lining up the left side, and then marking the width on the right side. For about $10 or less (check this one out on Amazon), you can easily cut thin pieces of wood and molding without having to use power tools. Be sure the clamps dont get in the way of the wood, though. When cutting the right side of the picture frame molding with the miter box, line up this marked line.. .with the edge of where the blade will cut. Im did end up laminating my checklist so that I can reuse it over and over without having to remove the back. A bit pricey, yes. . Even if youve got power tools, youll want to add a miter box to your DIY toolkit. I think home should be affordable. 30 Homemade DIY Greenhouse Plans (Free PDF). (Psst! With this cut, well be able to measure how wide we need to make the DIY picture frames. But picture frame molding already comes routed with a rabbet cut (in various depths), so all you have to do is cut the molding at 45-degree angles andVOILA!youve got a picture frame. very helpful video!! If have odd-shaped items that youd like to frame, that would be too expensive to pay for custom-sized frames. But since I have always bought frames from the thrift store and have never tried to make my own DIY picture frames, I had no idea it even existed! Turn an Old Knife Block into a DIY Crayon Holder, How to Make a DIY Polka Dot Stencil from Paint Chips, Light-duty stapler or small nails for holding in the picture/cardboard, A piece of cardboard (cut from a cardboard box). If youre cutting something square, all 4 pieces will be the same length. There are three ways you can cut wood with a miter box: Position #1 Cut the wood at a straight 90-degree. All those pieces of artwork that hubby has stashed in the closet can now be framed. There was an error submitting your subscription. Required fields are marked *, document.getElementById("comment").setAttribute( "id", "aba10d5fe42a2c756520f0b674a43671" );document.getElementById("d77b09630b").setAttribute( "id", "comment" );Comment *. I couldnt believe it was so easy to make! Love that idea!). Forget pulling out the intimidating tools. Heres my final verdict on DIY picture frames: Did you enjoy this tutorial? DIY CRAFTS | DIY PROJECTS | DIY HOME DECOR IDEAS, 60 DIY Pallet Garden Ideas | Vertical Pallet Herb Garden, 82 Cheap DIY Wall Art Ideas to Make for Home Decor, Aquarium Driftwood; Safest Types for Your Fish Tank. Position #2 Cut the wood at 45-degrees THIS way. Im not a professional framer so who knows if Ill stretch it properly, but this would be a pretty good DIY solution for framing! Using 150-grit sandpaper, sandthe custom picture frame, paying particular attention to the corners where it can be a little sharp. Once the picture frame has had time to dry, remove the clamps and turn it over. To secure the back, I used a light-duty stapler to staple into the edge of the wood in the back, which was enough to hold the cardboard and checklist inside. Success! Thats pretty important for getting a clean cut. If they have the size you need, why make your own?? At that point, I was then ready to cut the other 45-degree angle. Picture frame molding can be expensive. Otherwise, it may chip off like mine did when I sawed through it. For this project, I didnt get glass cut, but you can easily head to a local hardware store (check your local listings for who offers this service; not every home improvement store does). Plus, sometimes its easier to use a miter box for a quick and easy little cut. do you think its possible to do it even without miter box?? Now check your email to confirm your subscription. hello! Have you ever made your own DIY picture frames? Theyre super easy to attach with a hammer on the back. Youre now ready to glue themtogether and then clamp them to dry. Thrift Diving inspires women to decorate, improve, and maintain their home themselvesusing paint, power tools, and thrift stores! Be sure to check out my Project Gallery for more DIY projects! Here are the simple steps for making your own picture frames. NOTE: If you got glue on the wood and didnt wipe it off properly, be sure to sand it off if you can. 6 Simple Garage Storage Solutions You Can Do Yourself! Housing Market Predictions 2023: Will it Crash in 2023? Save my name, email, and website in this browser for the next time I comment. How did they turn out? You can use the miter saw to also make a privacy window screen, because the idea is the same: cut four pieces of wood using a miter box to create a frame.